


If you’re like me, you grew up dyeing Easter eggs straight out of a Paas kit. It was a yearly delight, but the experience was short-lived and perfunctory. And let’s be honest, using the metal egg dipper often brought frustration rather than ease as I struggled to check on my eggs in the dye solution. While I’ve done the kit with my daughters (complete with stickers and messy glitter, oh my!) this year, I was encouraged to start a whole new egg dyeing tradition with natural Easter egg dye.
My daughters are at a point where they are interested in science and the natural world, and I wanted to foster their curiosity and creativity without store-bought chemicals in their little hands. I discovered the world of making natural egg dye from vegetables and spices that we often use in our kitchen. There are a few more steps in creating dye beyond watching a tablet fizz in vinegar, but my daughters were so excited to be a part of the process.
Between chopping vegetables, measuring spices, and submerging eggs in our dyes, there was plenty that both my toddler and kindergartener could do. Because dyeing eggs in natural dye take longer than store-bought methods, it was an excellent lesson in patience and delayed gratification, and their eyes lit with wonder at the final results. Plus, we had a lot of fun as a whole family. Here’s everything you need to know about making your own egg dye with your kids this Easter.
Gather Your Supplies
In theory, most everything you need can be found in your own kitchen, but you need to make sure that you have the following gear on hand:
- pots
- tablespoon measurer
- liquid cup measurer
- chopping knife & cutting board
- cooling rack
- mesh strainer
- jars with lids (I prefer to use large mason jars)
- white eggs
- distilled vinegar
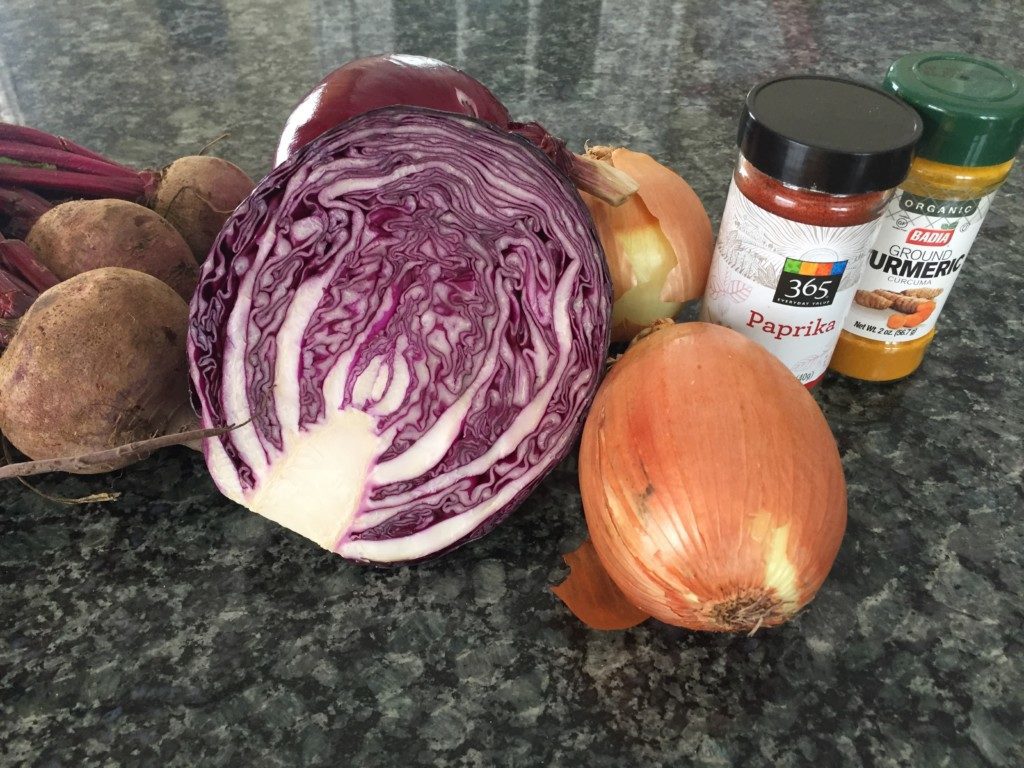
Next, you’ll need vegetables and spices to make your dye.
Our recommendations are:
- yellow onion peels (from 4-5 large yellow onions)
- red onion peels (from 4-5 large red onions)
- red cabbage (1/4 head, chopped)
- beets (3-4 beets, peeled and chopped)
- turmeric (3 tablespoons)
- paprika (2 tablespoons)
 Pro tips
- Collect yellow and/or red onion peels as you cook. And by “peels,” I mean the stuff that flakes off the onion that you get rid of anyway.
- If you buy onions that you don’t plan on using right away, you can submerge the peeled onions in water and put in the refrigerator to keep longer. Added bonus to doing this? The onions won’t make you cry when you cut them!
- Grocery stores will often let you bring home a bag full of leftover peels from the onion bin, which can be a win-win for everyone.
Creating Your Dyes
 As a busy mom, I wanted to make creating the dyes as simple as possible. For every dye I made, I boiled 4 cups of water and added 3 tablespoons of vinegar once my dyes were boiled. Here are the steps:
- Hard boil white eggs in one pot.
- Bring four cups of water and your vegetable of choice to a boil in a separate pot. Check as the water boils to see if your dyes are achieving the color you want; I recommend about 15 to 20 minutes.
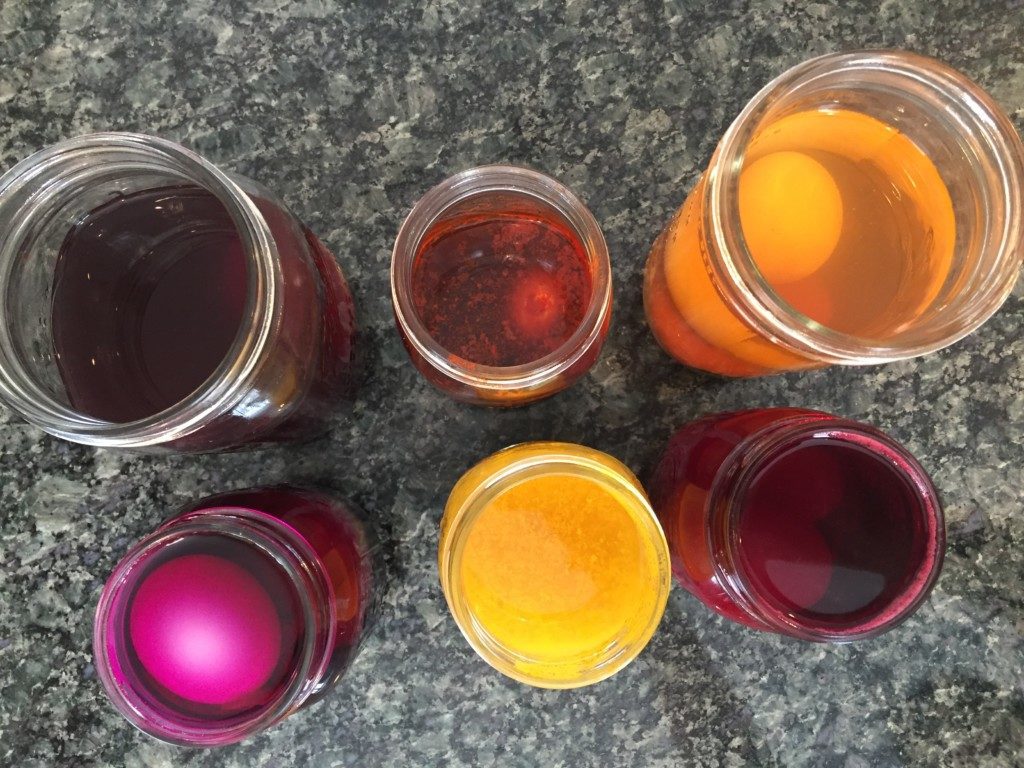
- Place the mesh strainer over a large mason jar and pour dye mixture into a large mason jar to remove food bits. Leave enough room to add 3 tablespoons of vinegar and stir.
- Let dye cool.
- Add hard-boiled eggs and leave in the refrigerator or store in a cool place.
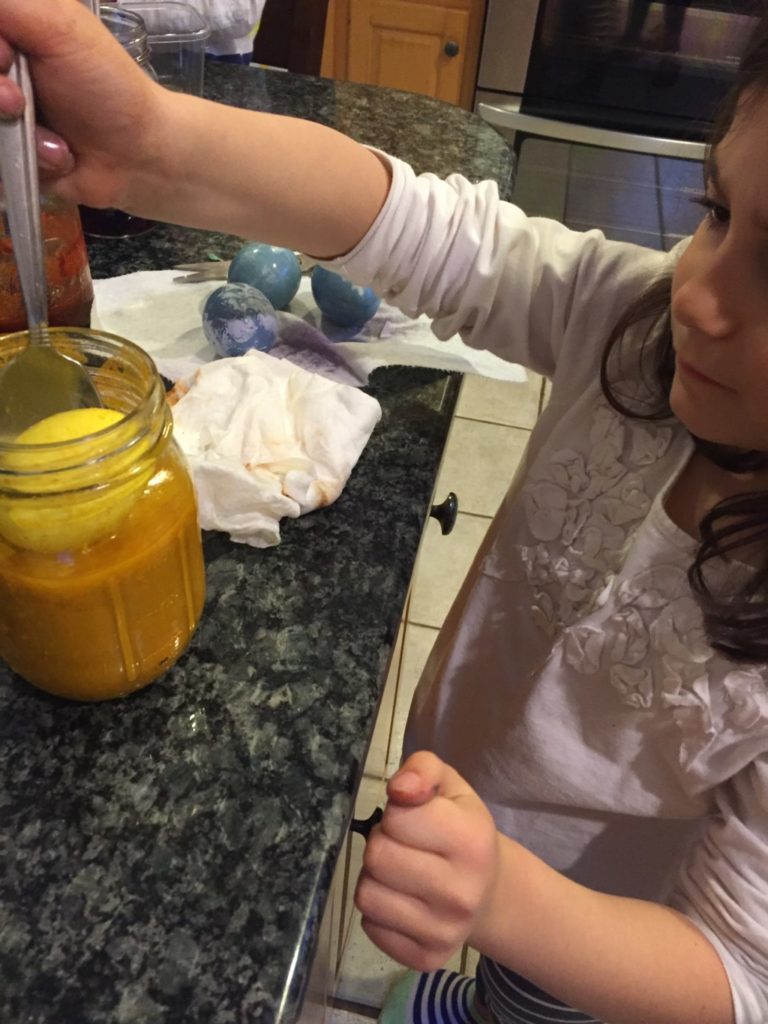
- Once your eggs have achieved the color you want, remove the eggs from the mason jars with a spoon or tongs and place on a cooling rack to dry.


Pro tips for natural Easter egg dye
- Simmer the paprika and turmeric; otherwise, the spices boil too rapidly.
- For deeper hues, boil your dyes and eggs together at the same time. It will save time, but then again, your kids might prefer to dye eggs separately like mine did.
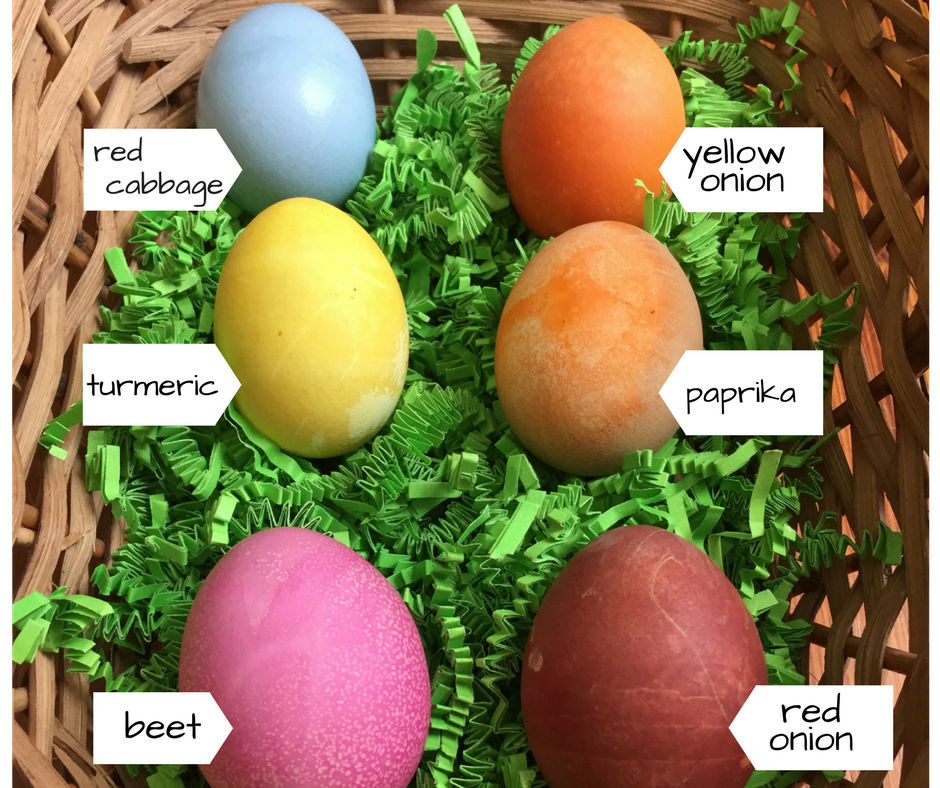
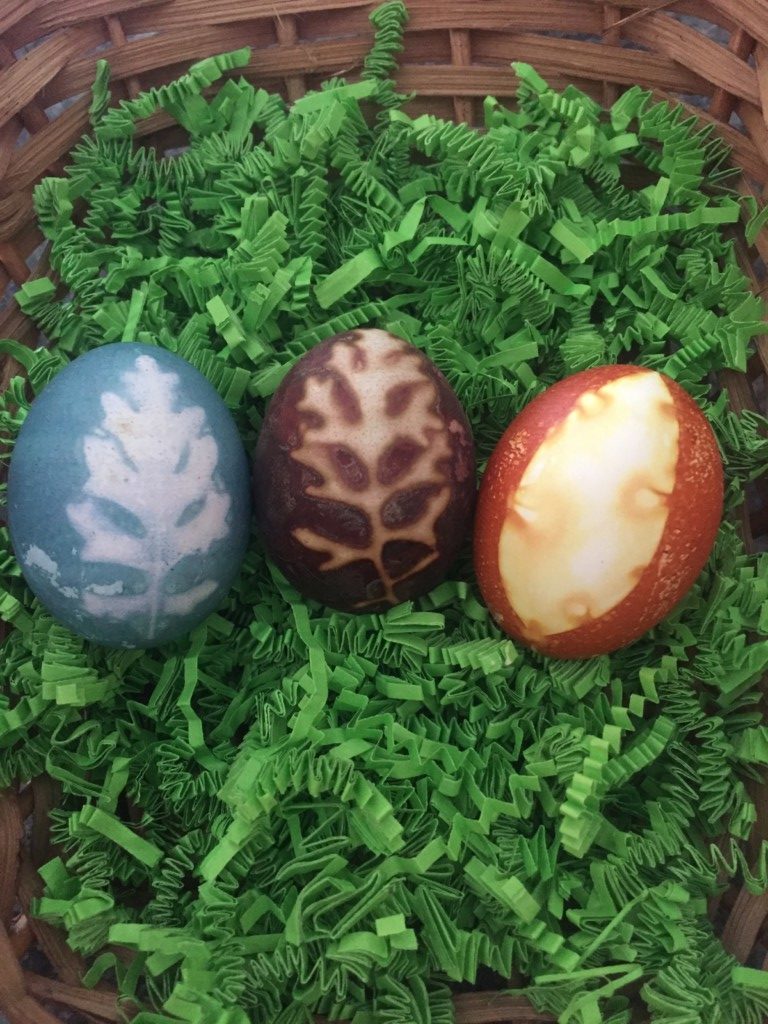
- Check on your eggs periodically. While it will take longer for natural dyes longer to set, there is no uniform time to leave your eggs in the dye. Turmeric and beets will dye the eggs faster than other dyes; red cabbage should be left overnight. If paprika dye is left too long, the eggs will go from orange to brown. Experiment, too, with the colors you want.
- If you want to stick to primary colors for your natural Easter egg dye, I recommend going for beets, turmeric, and red cabbage. Surprise: red cabbage dyes white eggs blue. For a little added extra science fun, have your children guess what color they think the eggs will turn once dyed. The red cabbage is certainly a fun surprise for everyone!
- If your kids are older, you can blow the yolk out of the eggs instead of boiling them.
- Natural Easter egg dyes will give your eggs a matte appearance. If you’d like them to be glossy, rub them with olive oil.
Decorating Option
You can still find fun ways to decorate eggs with natural dye, but these decorations will happen before the egg dyeing begins! For decorations, find fun shaped leaves, flowers, clover, or other natural materials that are small enough to lay flat against an eggshell. You can plan an afternoon to go for a walk or a hike with your kids or send them out to the backyard to find the most perfect decorations for their eggs. Once you’ve found your items, you’ll also need: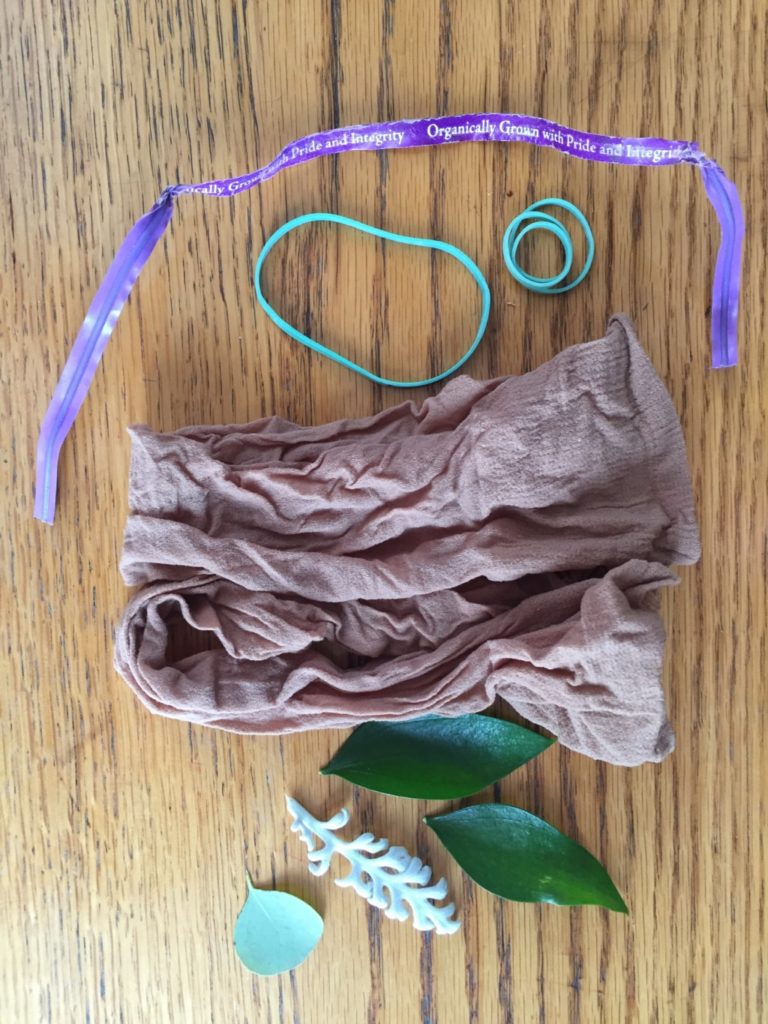
- knee-high nylon stockings
- twist ties or rubber bands
- scissors
- your hard-boiled eggs
- your egg dyes, ready to go in mason jars
 To decorate
- Place your leaf or flower against the eggshell. Make sure your object lays flat against the egg. (You might even use a little bit of water to help it stick to the eggshell better.)
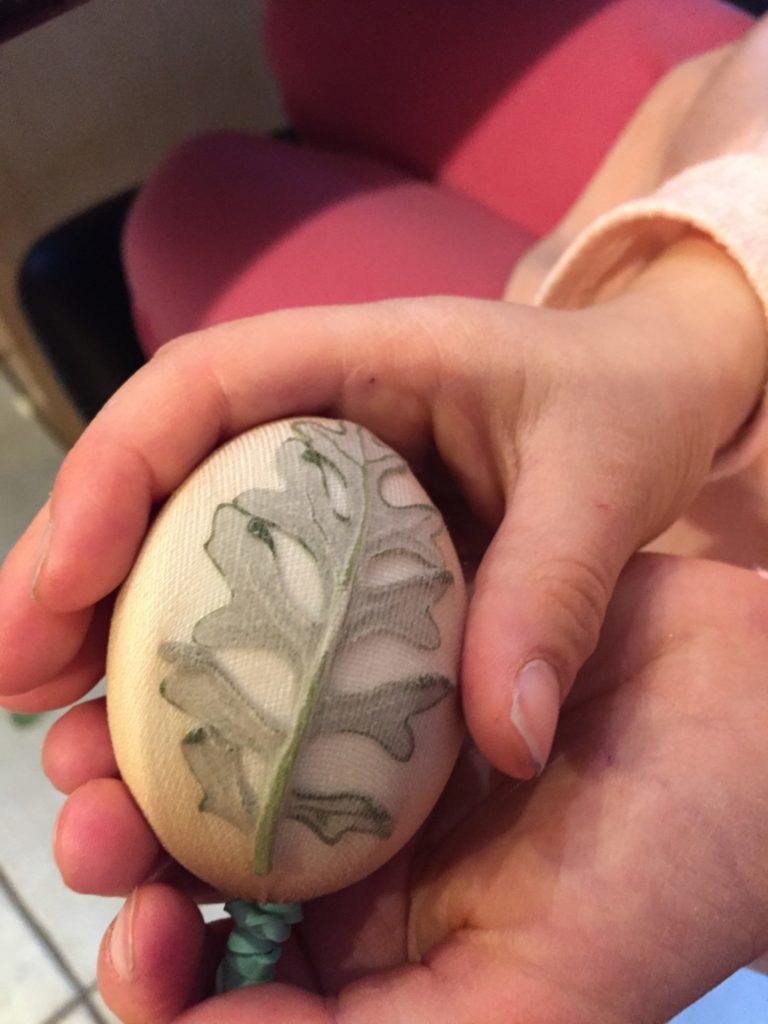
- Take the nylon stocking and place it around the egg. Make sure your leaf or flower stays in place, and be careful not to bunch the stocking up. Double check that the stocking is taut around the eggshell, and tie the nylon in place with a twist tie (easiest) or rubber band (what I happened to have in my house). Cut the loose end of the stocking off.
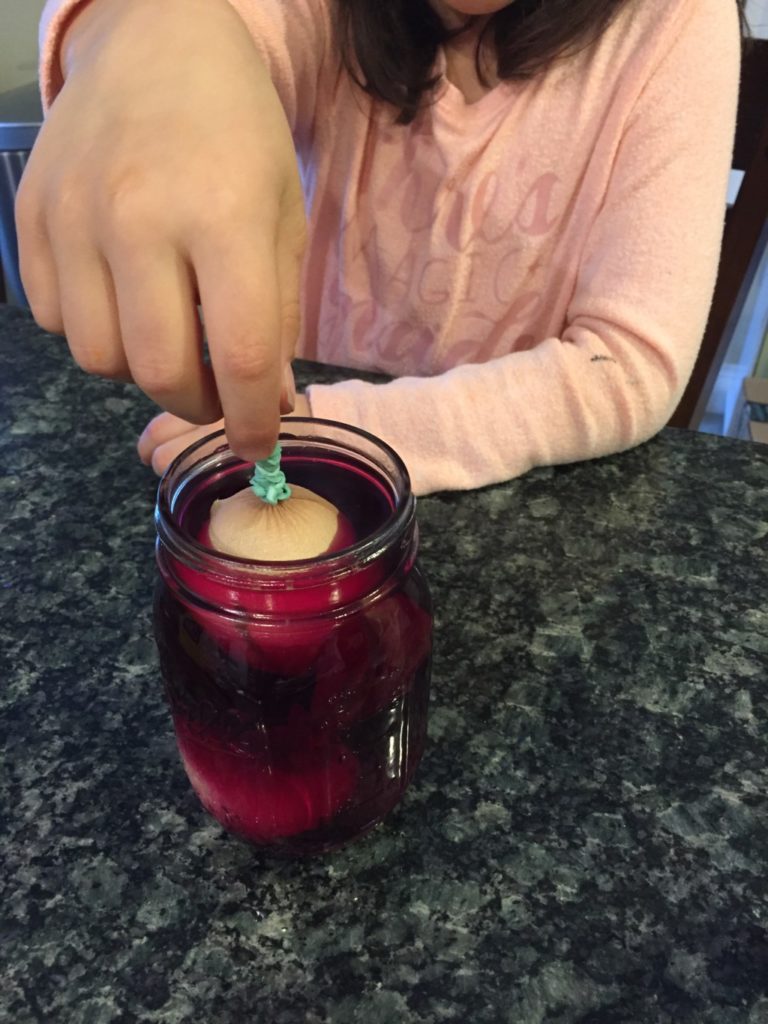
- Place egg in the dye. Once they’ve achieved the color you like, remove the twist tie or cut off the elastic band and place eggs to dry on a cooling rack.
And voilà! Your eggs are decorated!
 Science Extension
Check out our printable for fun science extension activities to complete with your children. Click here to download it.
![]()


